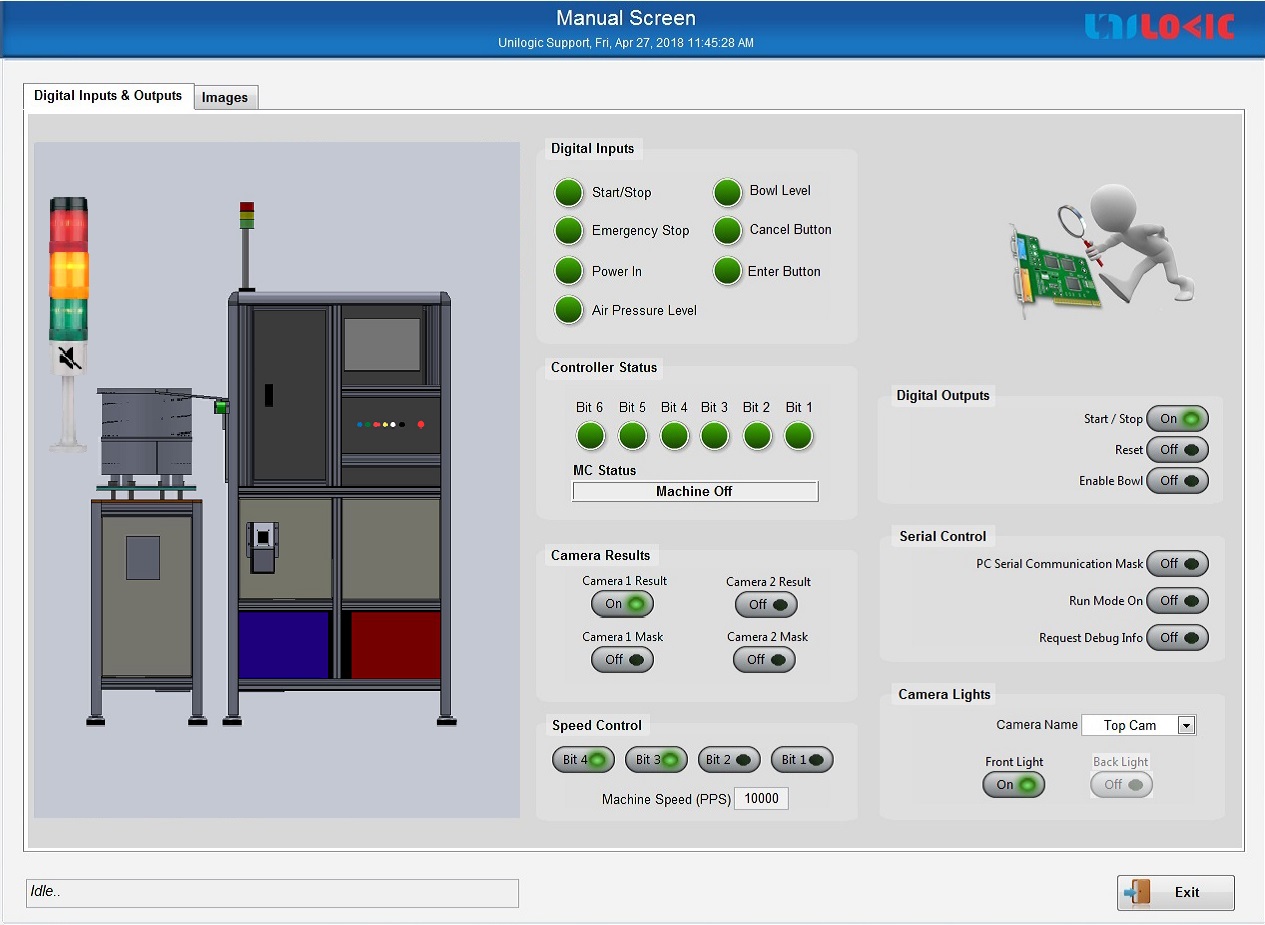
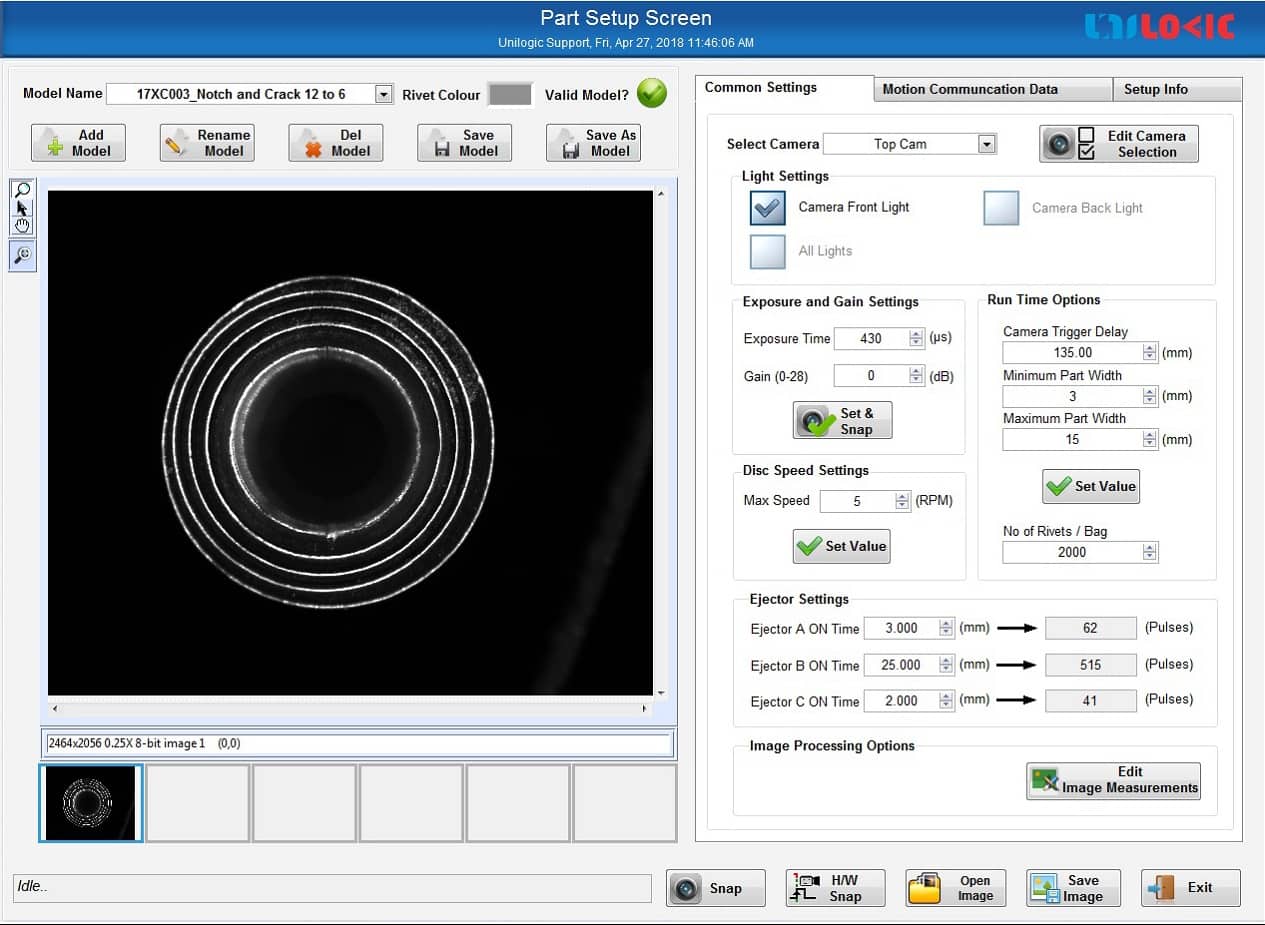
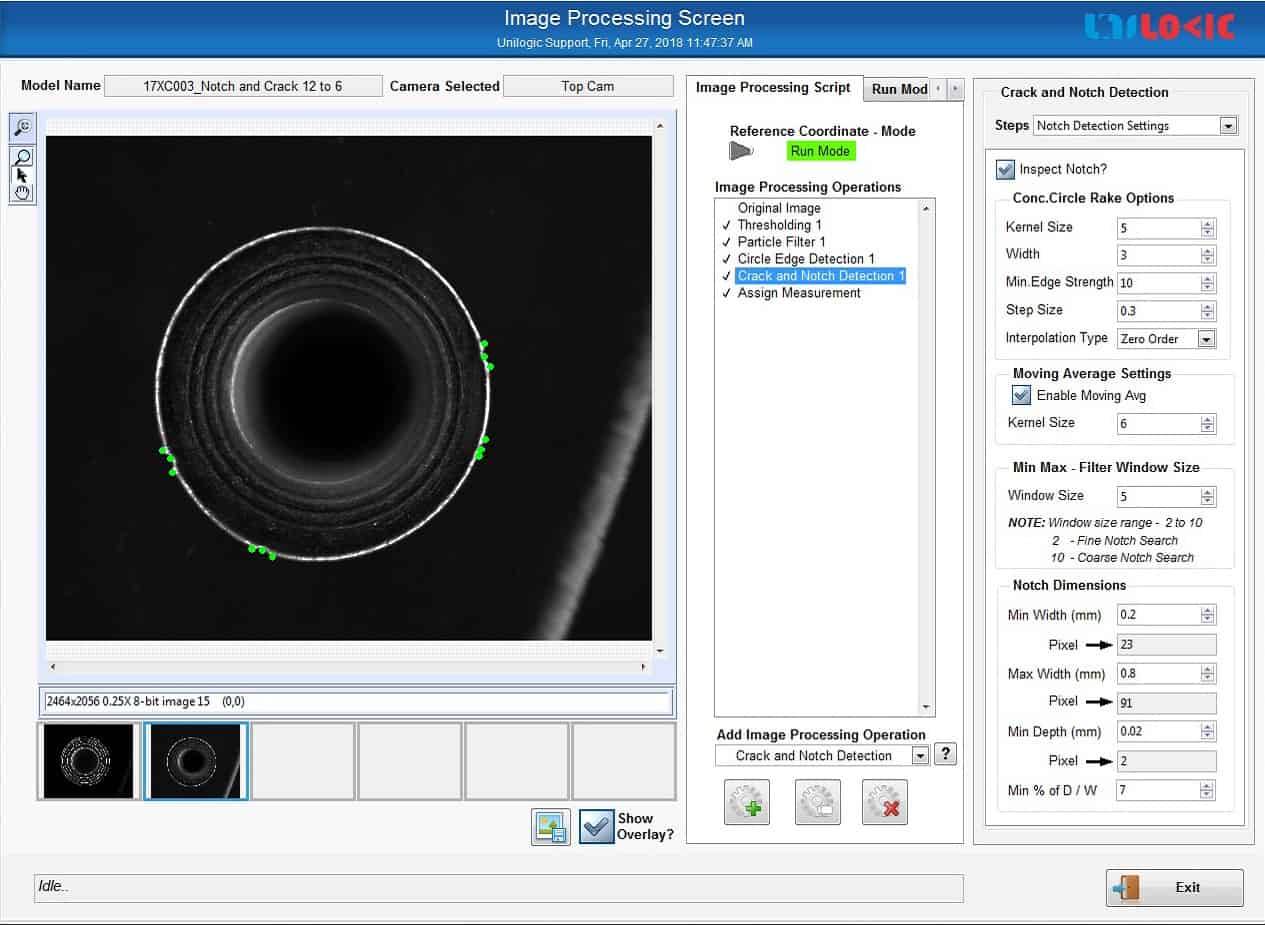
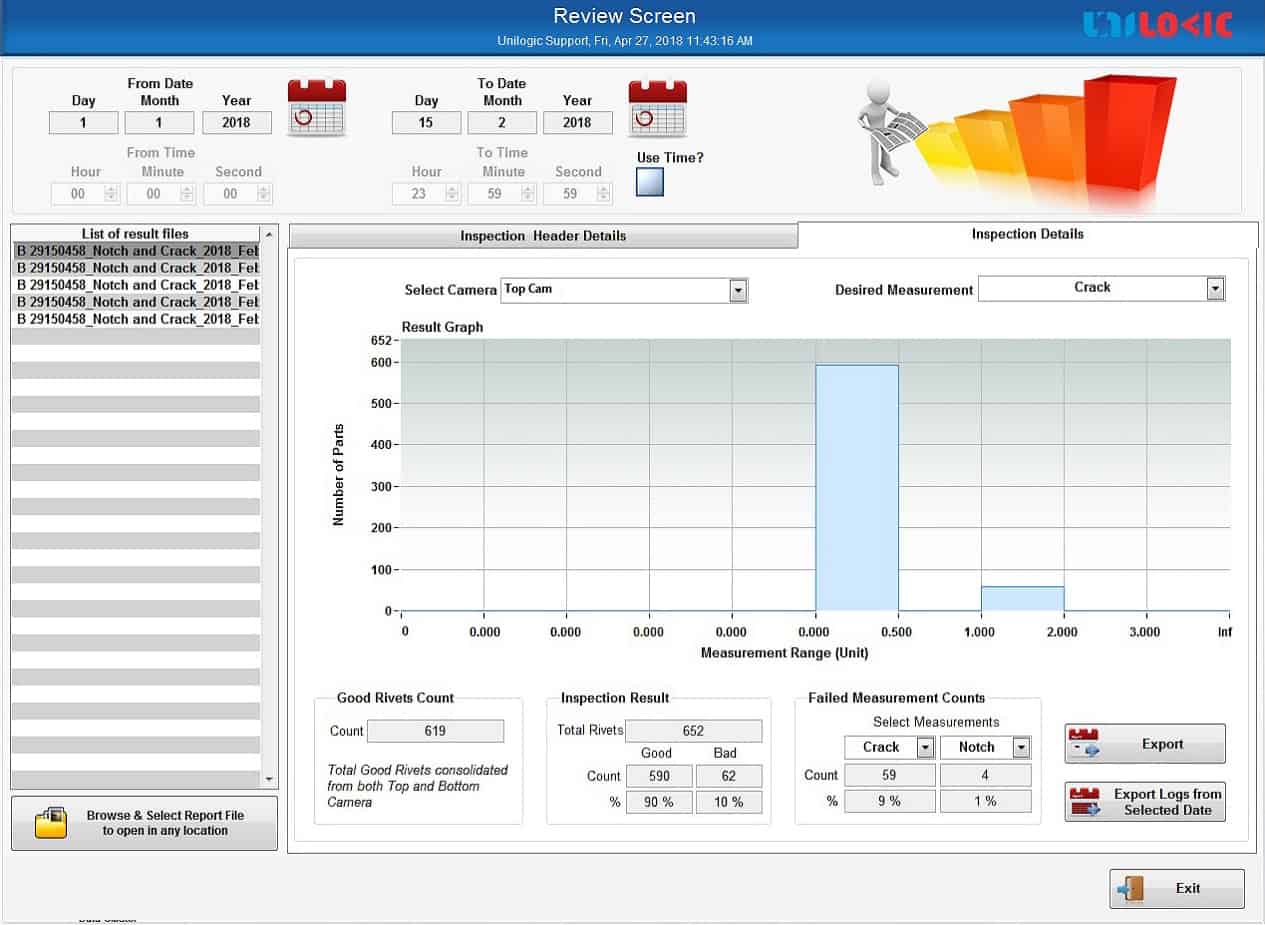
Rivet Inspection System is a vision-based system to inspection to inspect various defects on Rivets like Notches on Peripheral, Cracks on the surface and other punching defects and also detects the rivet colour and identification symbol. Rivets come from a vibratory bowl in an aligned manner and lands on rotating glass disk. The Rivet Images are captured under top and bottom cameras to inspect defects and identification respectively. The machine is capable of inspecting 3 parts per second and failed rivets are ejected out using pneumatic ejectors. All the total pass-fail counts are monitored in bar chart display and Recorded test data can be retrieved in the graphical user interface with different filtering options and exported into excel format files.
| S.No | Specification Parameter | Typical Value/Range | Comments |
|---|---|---|---|
| 1 | Machine Inspection Speed (Parts/Second) | 3 to 4 | Based on Part Size |
| 2 | Head Diameter (in mm) | Min: 9; Max: 12 | Top Camera View |
| 3 | Head Thickness | Min:0.6; Max: 2 | Side Camera View |
| 4 | Shank Diameter | Min:4.84; Max: 6.95 | Side Camera View |
| 5 | Shank Length | Min: 5.3; Max: 12.5 | Side Camera View |
| 6 | Top View Dimensions – Accuracy (in microns) | ±7.5 | Based on 5 MP Area Scan Camera & 18.5 mm FOV (1 Pix ~7.5 um) |
| 7 | Top View Dimensions – Resolution (in microns) | 7.5 | Based on 5 MP Area Scan Camera & 18.5 mm FOV |
| 8 | Top View Dimensions - Repeatability (in microns) | ±7.5 | Based on 5 MP Area Scan Camera & 18.5 mm FOV |
| 9 | Side View Dimensions – Accuracy (in microns) | ±11.5 | Based on 5 MP Area Scan Camera & 28 mm FOV (1 Pix ~11.5 um) |
| 10 | Side View Dimensions – Resolution (in microns) | 11.5 | Based on 5 MP Area Scan Camera & 28 mm FOV |
| 11 | Side View Dimensions – Repeatability (in microns) | ±11.5 | Based on 5 MP Area Scan Camera & 28 mm FOV |
| 12 | No. of Area Scan Cameras | 2 | |
| 13 | Machine Length * Width * Height (in mm) | 2000 * 900 * 1900 | With Bowl: 2000 * 900 * 1900 |
| Without Bowl: 1000 * 800 * 1650 |
Benefits
-
- More number of setups can be configured for different types of Rivets
- A single person can do inspection
- Results are logged automatically into Database
- Automatic report generation
- Less inspecting time
- Less power consumption (electric and pneumatic)
- Report view software for managers
Features
- Following inspection scan done by the inspection software.
• Notch Detection.
• Crack Detection.
• Rivet Colour Identification
• Rivet Symbol Identification. - Configurable Image Processing functions.
- Configurable Search Area on the Rivet for Crack Inspection.
- Export Consolidated Excel/pdf form of Reports.
- Authentication Feature.
- User can be able to operate the Machine without PC access.
- Low Rivets in the Bowl Indication alarm.


